Setting up a Reef Aquarium . . .
in 5 Easy Steps
If you've ever dreamed of having a spectacular reef aquarium in your home, but think you lack the time, funds, or knowledge required, think again! Creating a beautiful reef ecosystem does not have to be complicated. The following five easy steps will help simplify the process. In a period of just 12 weeks, you too can enjoy the colorful beauty of a home reef aquarium for many years.
 Products used:
- 46" Bowfront Stand
- 46 Gallon Bowfront System II Aquarium (including built-in filtration)
- 36"
Dual Satellite Compact Fluorescent Fixture or a comparable light fixture
- 100W
Visi-Therm heater
-
Coralife Power Center
- Two, 20-lb bags of
Indo Pacific Black Sand
- 50-gal mix of
Tropic Marin salt
-
36# of Select Lalo live rock
-
22# of Select Premium Fiji live rock
-
Prizm Skimmer
STEP 1
Week 1: Assemble the Aquarium and Cure the Live Rock
- Pour the sand into the aquarium.
- Prepare saltwater in a mixing container so that the specific gravity measures 1.025.
- Carefully fill aquarium with the prepared saltwater.
- Gently rinse live rock in a small bucket of prepared saltwater. Remove loose organic debris and examine carefully for unwanted hitchhikers. Arrange the live rock in your aquarium as desired.
- Install aquarium equipment per manufacturer's instructions. Run the protein skimmer and main filtration system to make sure there is constant water movement. However, keep the lighting system off during the cycling period in order to reduce the likelihood of undesirable algae growth.
- For the next 4 weeks, perform a 50% water change each week to properly cure your live rock. During your water change, siphon out any loose organic matter. Test for ammonia and nitrite and make sure these levels are zero. Also, test the pH and adjust as needed to achieve the desired level of 8.1-8.4.
 STEP 2
Week 4: Add your First Inhabitants
You will need:
- 30 gallon Algae Attack Pack (various snails and crabs)
- Acclimate and release your new inhabitants into the aquarium per acclimation guide.
- Use the timer to set the lights to go on and off in 12-hour increments.
- Wait 2 weeks.
 STEP 3
Week 6: Add your First Corals
You will need:
- Coral Pack (contains Button Polyp, Yellow Colony Polyp, Hairy Mushroom Coral, and Bullseye Mushroom Coral)
- Perform a 25% water change.
- Acclimate the corals per acclimation guide. Place the corals onto the live rock.
- Wait 2 weeks.
 STEP 4
Week 8: Add Aquacultured Corals
You will need:
-
Silver Branch Pumping Xenia
- Regular Pumping Xenia
- Starburst Polyps
- Colony Polyps
- Cauliflower Colt Coral
- Taro Tree Coral
- Toadstool Mushroom Leather Coral
- Spaghetti Finger Leather Coral
- Acclimate the corals per acclimation guide. Place them onto the live rock.
- Wait 2 weeks.
 STEP 5
Weeks 10 and 12: Add Fish & Invertebrates
Add 2 Scarlet Cleaner Shrimp, 3 Hawaiian Feather Dusters, and a total of 6 fish. Choose from:
Maintaining Your Reef Ecosystem
- Monitor and test water parameters regularly to provide a healthy marine environment.
- Perform 25% water changes at least once a month and perform regular filter maintenance.
- Feed thawed small amounts of frozen food, twice daily. The fish should be able to finish the given portion of frozen food within a few minutes. For a nutritionally balanced diet, feed a variety of foods to your fish such as:
Mysis shrimp, Ocean Plankton, Mega-Marine Algae, TetraMarine Granules, and
Sea Veggies. Provide Phytoplankton every other week for feather dusters and other filter feeding invertebrates.
For healthy corals, add the following reef supplements per recommended instructions:
By following these steps, you'll have a complete and successful reef aquarium. Sit back and watch in awe as your aquarium comes alive. Each day there will be new things to discover and an unending diversity of changes to witness. Keep in mind, reef aquariums need considerable time to establish themselves. Within a year, you'll have a beautiful, thriving ecosystem.
|
|
|
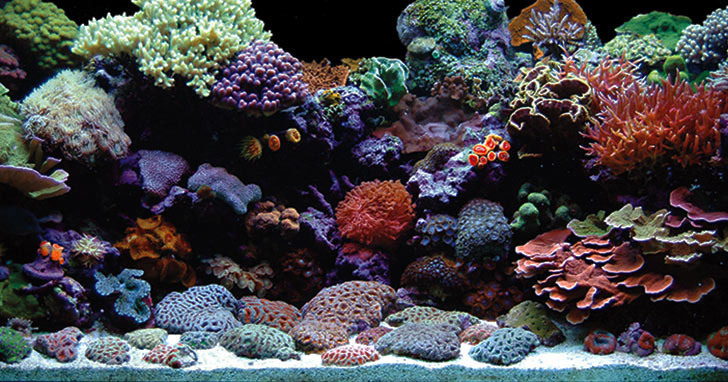
Here is our reef aquarium after 1 year: |
 |
|


