
Additional sizes may be available!
Additional sizes may be available! Email me when available
Overview
| * | Easy-to-use pond water test kit for early detection and correction of potential water quality issues |
| * | Measures four important pond water parameters including pH, ammonia, nitrite, and phosphate |
| * | Pond Master Test Kit contains 500 tests (6 test solutions, easy-to-ready instructions, glass test tubes and color chart) |
Complete system for testing both tap and pond water. Contains four essential tests to protect fish from dangerous water conditions. Tests include: pH, ammonia, nitrite, and phosphate. Each kit contains an instruction book, improved color cards for easier reading of test results, four test tubes and a holding tray.
Instructions for the Wide Range pH Test
Why Test for pH?
pH is the measure of acidity or alkalinity in water. A pH reading of 7.0 is neutral, a pH higher than 7.0 is alkaline and a pH lower than 7.0 is acidic. A healthy pond depends on proper pH balance. Many factors can significantly alter pond water pH, creating an unhealthy environment for pond life. Acid rain, minerals leaching from soil or rain runoff, decomposing plants and animal waste can all contribute to unstable pH levels in the pond.
A pH of 7.0 is considered ideal for plants and fish in the pond. Some species of pond plants, such as water lilies and water hyacinths thrive in slightly acidic water below 7.0. Pond fish prefer an alkaline pH above 7.0. Therefore, an acceptable pH range is between 6.8 and 7.6. Extreme pH levels above 7.6 or below 6.8 should be avoided.
Nearly all ponds tend to turn slightly acidic (between 6.8 and 7.0) as the pond life develops. A pH below 6.8 will stress pond inhabitants. A low pH may be caused by increased carbon dioxide concentrations, overstocking with fish, or poor surface agitation. Proper fish stocking as well as adequate pond filtration or fountains will correct carbon dioxide buildup and help stabilize pH.
A low pH (acidic water) may also be caused by decomposing organic matters, solid waster from fish and birds, and decaying vegetation. The use of PondCare Pond-Zyme Plus with Barley (#907039 & 907052) or PondCare ECOFIX (#11762, 11874, and 24820) and regular pond maintenance will help to eliminate stressful pH fluctuations.
Directions for Testing pH
Read thoroughly before testing.
- Fill a clean test tube with 5 ml of pond water (to the line of the tube).
- Add 5 drops of Wide Range Indicator Solution. Hold dropper bottle upside down in a completely vertical position to ensure uniformity of drops.
- Cap the test tube and invert tube to mix solution. Do not hold finger over open end of tube as this may affect the pH of the test solution.
- Determine the pH by comparing the color of the solution with those on the pH color chart. The test tube should be viewed against a white background in a well-lit area. Note: After testing is completed, do not pour the test tube contents back into the pond. Rinse the test tube with clean tap water after each use.
Instructions for the Ammonia Test
Why Test for Ammonia?
Ammonia is a toxic waste excreted into the pond by fish, birds, and other pond life. The natural process that controls ammonia in the pond is called the biological filter. The biological filter is comprised of nitrifying bacteria that use ammonia as a food source to grow and reproduce. The nitrifying bacteria convert ammonia to nitrite (also toxic), which in turn is converted into non-toxic nitrate. A healthy pond has no detectable ammonia.
Newly set up ponds need time to develop the biological filter. Until sufficient numbers of nitrifying bacteria grow in the pond, ammonia will be detected. Overstocking the pond with fish, uneaten fish food, and decomposing vegetation can cause excessive ammonia. Ammonia is highly toxic to all pond life.
What the Test Results Mean
In newly set up ponds, the ammonia level may surge up to 10 parts per million (ppm) or more and then fall as the biological filter becomes established.
In established ponds, the ammonia level should always be zero. Ammonia levels above 0.5 ppm indicate possible overfeeding, overstocking of fish, or excessive decay of organic matter. The elevated ammonia level is not necessarily an indicator of the nitrite level. The nitrite level should be tested separately on a regular basis.
Directions for Testing Ammonia Levels
Read thoroughly before testing.
- Fill a clean test tube with 5 ml of water to be tested (to the line on the tube).
- Add 8 drops from Ammonia Test Solution Bottle #1. Hold the dropper bottle upside down in a completely vertical position to ensure uniformity of drops added to the water sample.
- Add 8 drops from Ammonia Test Solution Bottle #2 . Hold the dropper bottle upside down in a completely vertical position to ensure uniformity of drops added to the water sample.
- Cap the test tube and shake vigorously for 5 seconds. Do not hold finger over the open end of the test tube, as this may affect the test results.
- Wait 5 minutes for the color to develop.
- Read the test results by matching the test solution against ammonia color chart. The test tube should be viewed against the white area beside the color chart. Color comparisons are best made in well-lit areas. The closest match indicates the ppm (mg/L) of ammonia in the water sample. Note: After testing is completed, do not pour the test tube contents back into the pond. Rinse the test tube with tap water after each use.
Instructions for the Nitrite Test
Why Test for Nitrite?
Fish, frogs, birds, and other pond animals release solid waste into the pond water. This waste is turned into toxic ammonia. Nitrifying bacteria in the pond convert toxic ammonia to nitrite (also toxic). Nitrite is then converted to nitrate.
Newly set up ponds have not developed sufficient nitrifying bacteria to detoxify ammonia and nitrite. Ammonia and nitrite will accumulate when the pond is initially set up, especially if fish are added. Overstocking with pond fish, as well as excessive uneaten food and decomposing vegetation can cause excessive nitrite levels. Some pond plant fertilizers contain nitrite or ammonia. Nitrite is highly toxic to pond fish.
What the Test Results Mean
In newly set up ponds, the nitrite level may surge up to 10 parts per million (ppm) or more and then fall as the nitrifying bacteria become established, forming the biological filter.
In an established pond, the nitrite level should always be zero. A nitrite level of 0.25 ppm, or higher, indicates possible overfeeding, overstocking, of fish, or excessive decay of organic matter. The elevated nitrite level is not necessarily an indicator of the ammonia level. The ammonia level should be tested separately on a regular basis.
Reducing Nitrite Level
In newly set up ponds, ammonia and nitrite levels will rise and then drop in 2 to 4 weeks, indicating the formation of the biological filter. Therefore, it is essential to only add a few pond fish for the first few weeks of the initial pond set up. After both ammonia and nitrite levels drop to zero, more pond fish and animals can be added. Make sure adequate oxygenation and surface agitation are provided. If the nitrite level exceeds 0.50 ppm, begin making water changes (25%) every two days until nitrite levels drop to 0.25 ppm or less.
Protect Fish from Nitrite Toxicity
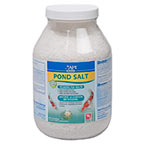
Even a low level of nitrite can cause severe stress on pond fish, leading to disease outbreaks and fish death. Nitrite toxicity affects the blood's ability to carry oxygen throughout the body, leading to suffocation. To reduce the effects of nitrite toxicity, add Water Repair™ Pond Salt (#28347 & #28348) or PondCare Pond Salt (#111676) to the pond as directed. Pond salt will also add the natural electrolytes fish lose in times of stress.
Directions for Testing Nitrite Levels
Read thoroughly before testing.
- Fill a clean test tube with 5 ml of pond water (to the line on the test tube).
- Add 5 drops of Nitrite Test Solution. Hold the dropper bottle upside down in a completely vertical position to ensure uniformity of drops.
- Cap the test tube and shake well for 5 seconds. Do not hold finger over open end of test tube as this may effect the test results.
- Wait 5 minutes for full color to develop.
- Hold the test tube against the white area above the color chart. Compare the sample with the printed color chart.
- The closest match indicates the total nitrite in the water sample. Note: After testing is completed, do not pour the test tube contents back into the pond . Rinse the test tube with tap water with each use.
Instructions for the Phosphate Test
Why Test for Phosphate?
Phosphate enters the pond from fish waste and decaying organic matter, such as dead algae and uneaten fish food. Water treatment facilities may add phosphate to tap water to prevent pipe corrosion and reduce concentrations of heavy metals in drinking water. Excess phosphate may lead to algae blooms.
Testing Tips
This test kit reads the total phosphate level in parts per million (ppm), which are equivalent to milligrams per liter (mg/L), from 0 to 100 ppm (mg/L).
Directions for Testing Phosphate
Read thoroughly before testing.
- Rinse a clean test tube with water being tested.
- Fill the test tube with 5 ml of water to be tested (to the line on the tube).
- Holding the bottle vertically, add 6 drops from Phosphate Test Solution Bottle #1. Cap the test tube and shake vigorously for 5 seconds.
- Then, while holding the bottle vertically, add 6 drops from Phosphate Test Solution Bottle #2. Note: Bottle #2 contains a very thick solution and may require increased pressure to release drops.
- Cap and shake the test tube vigorously for 5 seconds.
- Wait 3 minutes for color to develop.
- Read the test results by comparing the color of the solution to the Phosphate Color Card. The test tube should be viewed in a well-lit area against the white area of the card. The closest match indicates the ppm (mg/L) of total phosphate in the water sample. Note: After testing is completed, do not pour the test tube contents back into the pond. Rinse the test tube with tap water after each use.